Saturday, 6 June 2015

Broadfield Garden, Christchurch - An inspiration for planning a garden using natives


A visit to Broadfield Garden on the outskirts of Christchurch is truly inspiring for anyone looking for new ideas for a garden, especially their unusual use of natives to create herbaceous borders. I wanted to see the garden for this herbaceous border but found lots of other handy information for planning a planting for bees and insects.


On one side of the property a massive macrocarpa hedge shelters the garden, on the left is Peter and right is Dave Falls. 


We were privileged to be given an hour long personal tour of the gardens by gardener/builder/sculptor Dave Falls who has worked in the gardens for 11 years.

Peter (left) Humphrey the Spaniel centre and Dave Falls (right)
Behind them is a cotoneaster that Dave says always attracts
the cameras because of its striking topiary presence.

 The 3.5 hectare garden is owned by David Hobbs and the original design was by landscape architect, Robert Watson.
Robert was given a flat paddock to start with.  Owner, David Hobbs chose this property for the garden for one reason the soil.  Dave told us there is about 40 cm of River silt, and under that about 60 cm of clay and then river gravel.  This soil combination gives plants excellent growing conditions because of a good combination of free draining soil and good mineral availability in the clay. Kauri's and Totaras putting on half a metre of growth a year.

Native Herbaceous Borders


A red seat placed at the edge of the native herbaceous border.

I didn't take many photos of the herbaceous border because I was so intent on just observing the combinations of native plantings, plus I knew any wide shot photo of the two six metre by 120 metres long beds would undersell the garden.  It's something you just have to experience.  Originally this area was designed to have typical perennial herbaceous plants but David wanted to create a garden that could be maintained by one person. As he loved natives he decided to design and plant out this area in a native herbaceous border with taller plants in the back and smaller in the front.  He added some taller to the front to add variety and even has topiary columns of Totara. He discovered natives were far from limiting especially with the range of textures, forms and colours.


Divaricating Plants


Dave pointed out that Ireland has 42 shades of green but New Zealand has 52 shades of green.  It's not just the different greens but looking at the border you see foliage and fruits that add lots of colour.  But really where it wins hands down over a standard herbaceous border is the year round fullness and the variety of textures and colours. Just like managing a herbaceous border Dave told us they have to be a little ruthless and when a plant has started to get woody or too big out it comes.  Hebes are the only plants they propagate on site because they are the easiest plant to grow by cuttings in a pumice medium.
The lower half of the branch has the remainder of the juvenile form while the top has
oblong glossy olive green leaves.  Its  clusters of drooping white flowers appear from October
 and fruits until at least March.


New Zealand has the highest number of divaricating plants where the immature form present themselves as if they have had a bad hair day.  Under the messy tangle of tiny leaves there is often coloured stems that can catch your eye in the border.  I was intrigued by a divaricating tree I hadn't met before, Pokaka Elaeocarpus hookerianus. It's so helpful to see both the immature and mature tree forms in a garden like this.

1.8 kilometres of Totara hedging are bordering the gardens

Native Hedging

I think one of the most impressive points of the garden were the perfect Totara hedges. Dave tells us they are strong, nothing will eat them, you can cut quite severely and a Totara hedge will bounce back everytime. They can grow up to .5 a metre a year but saying that these hedges were started 20 years ago. One thing they do require is shelter, so at Broadfield they first planted poplar hedges to protect early hedges. Once the native plantings were established they were cut down.  The secret to such a compact hedge is close planting and cutting from the very start to encourage new spreading growth.

Perfectly presented Totara hedges border most of the garden rooms.
This is the entrance garden with Oaks in the centre underplanted in grey green grasses.


An area of curved Miro hedging with a sitting area. There are lots of
places to sit, rest and enjoy the gardens.  any Permaculturalist would approve of that.


There are other hedges made from Miro and Corokia. Dave says they have not been as successful as Totara because they get untidy very quickly and therefore need more work.  The Corokia hedges looked good but I felt it was a shame to reduce the amount of berries for the birds by hedging.

Topiary


As I mentioned in the Herbaceous border there were topiary columns of Totara but there are other examples of fun with trees especially with this topiary form that uses two trees to create different tiers using Griselinia and Totara.

Planting for Insects and Birds

What I didn't expect to find were a number of ideas for planting for birds and insects.  I absolutely loved all the varieties of small fruiting trees that provide the smaller sour fruit that birds prefer (and make amazing jellies).

A late yellow with a flush of red Crabapple still with an abundance of fruit.
There was also a small red variety of Crabapple


The red Japonica apple tree is also good for jelly making. It's a messy looking tree with tangled branches
but small birds like messy tangled trees for their nests. The flowers are an attractive intense red as above.
Nandina domestica "Richmond" looked like a good plant for birds but isn't.
It appears not all berries are equal.  I spied this Nandina in the gardens and thought yes a shrub that can grow as an understory in my food forest but upon investigation I discovered the berries are poisonous and most birds don't touch it.  It grows a little like bamboo on single stems and is attractive  in winter but won't have a place in my garden design because it only passes on attractiveness - nothing else.  I could use Corokia instead although  there are only a few berries left at this time of the year.

I smelt this Daphne before I saw it.

Dave pointed out that this Daphne is a large shrub variety and they have had a lot of success with it as the smaller Daphne is very touchy to grow.  I think it is Daphne birkwoodi and I would dearly love to have this growing in my garden and it can tolerate semi shade or full sun but it would not work well in my heavy clay soils and likes it acid where fruit trees are more alkaline.  There could be a place for it but not in the food forest unfortunately.  The other advantage is that it blooms spring and late autumn and it certainly was covered in blossoms for the bees in this garden at the end of May.

The weeping form Gleditsia tricanthos "Emerald Cascade"
I have since found out that Gleditsia is also known as Honey Locust.  I wanted to know what trees were legumes as I am planning to have every third tree in the orchard food forest as a legume to increase nitrogen levels. The size for this tree varies and I think that depends on whether grafting stock was used as this is a popular garden small tree because of its weeping form. Some sites say standard plants can grow 2 metres by 2.5 metres while others say3-4 metres width and 5-10 metres high.  They will tolerate semi shade. The best variety of Honey Locust to find is one that produces the long pods that can be fed to livestock.  They usually have long pods that can be fed to stock but they are also thorny...but this variety photographed didn't seem to have the thorns or pods. There is also a dark red/purple foliaged Gleditsia called "Ruby Lace".

Robinia pseudolacacia also known as Lacy Lady, Twisted Baby or Black Locust.
Robinia's nickname of Black Locust indicates that its close to Gleditsia (Honey Locust) with not so many thorns.  Peter and I really enjoyed the dainty and twisted or tortured form especially against the clear blue sky.  Apparently they have fragrant pea flowers that hang like Wisteria with a similar smell to orange blossom but the flowering is just short - about 10 days. They too are a legume, can grow in poor soil and is salt tolerant, but it likes water and protection from wind. It's renowned for its lovely pale yellowish brown wood; heavy, hard, strong, close-grained and very durable in contact with the ground. Downside is that Dave says he does have a lot of trouble with die back.  Still worth a try I think.  They are a very big tree in time but with regular wood harvesting the height could be kept in check.

Arbutus unedo known as the Strawberry Tree
This variegated leaved Strawberry Tree had plenty of fruit on it but few were ripe as yet.  When the fruit is falling off the tree the plant is already beginning to flower again with tiny cream bell shaped flowers a little like Lily of the Valley. If you eat the fruit before it is ripe it can make you feel nauseous and if the fruit has been ripe too long it can become intoxicating. There are reports of Tui's acting intoxicated after eating very ripe fruits from the Arbutus undo tree.  The fact that it has fruit or flowers nearly all year round is a plus for birds, insects and bees.  The tree is quite slow growing but you will be rewarded in time with a handsome tree..and you can make jelly from the fruits.

 Narcissus tazetta - the species name tazetta, an Italian word meaning little cup,
refers to the cup at the centre of the flower.

I was surprised to see Jonquils out so early - I imagine these garden's bulb plantings will be spectacular in spring.  And I was equally surprised to see so many roses still blooming in the rose garden filled with New Zealand bred roses.  This theme is continued elsewhere in the gardens with Camelias and Rhododendrons all being bred in New Zealand.  

I felt privileged to see Broadfield garden through the eyes of the gardener who helped to shape it. Dave's creativity is not limited to the garden, he has a number of sculptures throughout the gardens.

Dave Falls Oamaru stone sculpture "Give us a Hand"
This one was one of his first and he told us that the boss would always say "Dave give us a hand"..so he did.  The hand is placed so that it frames the final garden that is being developed into a wild flower meadow.

Brookfield is an incredible accomplishment and if you have the opportunity to go you will be encouraged at what can be achieved after only 20 years. The native New Zealand herbaceous border will give you lots of ideas of combinations of native plants.


We didn't leave empty handed as Dave gave us some seed heads of the naturalised native hibiscus, Hibiscus trionum.  Next year I will see if I can grow them.

Monday, 27 April 2015

"Good, better, best" - Stefan Sobkowiak and the Permaculture Orchard

Stefan Sobkowiak.... and Beyond Organics Permaculture Tour of NZ


Stefan lives and works in a much harsher climate than we do in New Zealand. In his permaculture orchard near Montreal, Canada he combats ice storms, metres of snow and temperatures that get down to -40, a spring that lasts 10 days and then summer temperatures averaging 35C.  It's a short but  good growing season.  There are some advantages to working in such a cold climate - you can do other things over winter where in the warmer parts of New Zealand there is always something to be done in the garden or orchard.

Stefan grows a permaculture orchard using the principle of food forest design but in a structured commercial orchard way.

Stefan with the wire trainers he uses to train tree branches.  They
are left in place for 2-3 months and if the branch still bounces back he will
keep them wired for longer.  He makes a number of lengths over winter ready for use
in summer.

At the Habitate Heritage Fruits Nursery in the township of Waitati (15 minutes north of Dunedin) we were treated to a half day practical workshop on the training and pruning of orchard trees. Stefan managed to impress not only the novice orchard growers like me, but others experienced in pruning.  Many left this workshop with a completely different view on training and pruning orchard trees.
Add caption

Stefan showed us step by step how to train and prune apple trees.

Training to Reduce Pruning by 80%

Training a tree involves selecting branches to grow in a downward slope from the trunk rather than up in the vase shape we have previously been told an apple tree shape should be.  By encouraging the branch downward it reduces the vegetative growth of new branches and increases the number of fruit spurs on each branch. A fruit tree only has so much energy and so it's important to focus that energy on producing fruit rather than vegetation.

The branches should slope like our arms on our bodies (Stefan demonstrating below) but the lead trunk should keep growing upward until it reaches it's ideal height.

Stefan illustrating the angle the branch should be off the trunk.
Photo by James Samuel Beyond Organic Tour NZ
 It's up to you what height you want but Stefan aims for a 4 metre tree simply to get the productivity he needs for a commercial orchard.  Once the lead trunk reaches your height, do not cut off it's head or it will sprout a number of branches from that cut. Just like us Stefan says a tree needs just one head.   You now bend this lead branch down so that it fruits but doesn't continue to grow upward.

If your tree has previously been pruned to cut out a central branch you have two choices. Treat each of the main branches like one tree, or select the strongest upward branch to become the new head.

Train in the middle of summer when there is enough sap flow for the branches to be supple and can be manipulated without the danger of cracking.

Small upward branches you do want to crack to lay in a downward position.  The tree quickly repairs the crack and this will mean you won't need to use wires next year to shape this branch.

Avoid doing this job if it's going to rain or is raining.  You need a few days of sun to avoid disease on the cracked twigs. A healthy tree will quickly wall off the break from infection. Stefan doesn't use pruning paste taking his cue from nature.  If the soil has a healthy soil biology the tree will repair itself fast.

When training choose the branches that are less than 50% of the size of the main trunk.  Each tree should have 12-14 branches so at this time you might identify the branches that may have to go at pruning time because they are either too big or is growing in the wrong direction for the line you want in your orchard.  If you have a pathway between your trees you do not want branches sticking straight out and blocking ease of movement and you don't want the branch touching the next fruit tree at the sides either.  So you aim to create an "X" shape to your branches.
Stefan said it was not the best time to train as the branches were
beginning to stiffen up...but then his byline throughout the day was
"good...better..best". Not always do you get the opportunity to do things at the
best time but it's better to do it now than wait for another year.

To train hold onto the branch where it meets the trunk while with the other hand twist towards you and gently but firmly push down the branch.  When at the position you want, with the hand that was at the trunk hook the wire from this branch to another branch to keep the branch in this downward position. Alternatively you can use ties but these wire hooks are easy to put on and take away.

After a couple of months the branch should stay in place.  If it doesn't put the wire back on the branch.

For established trees it could take three years to train the shape from a vase to branches in a downward motion.

Note Pear trees require branches to be in a horizontal not downward position for maximum fruiting.

Stefan Sobkowiak on tree training:
The French primarily from the research at INRA originally led by Dr. Jean-Marie Lespinasse progressed the art and science of pruning to a simple and far more efficient system... It has cut my pruning time by 80%. Training branches to a 100-120 degree angle (resulting in below horizontal branches) produces branches that are fruitful instead of being branchy. In the end do you want to grow branches or do you want to grow fruit. Each tree has a limited amount of energy and will put it into branch growth or fruit growth or both. Focus the trees energy in its youth to grow branches and once mature to grow fruit...
Limit your tree to 12-14 branches and you will get a commercial crop.
Each branch below the horizontal should be left intact or almost so and the pruning is simply the removal of growth BELOW the branch. This growth is usually shaded anyway so not as productive. This is pretty well the only pruning you do to a branch. Do not cut the tips. The branch continues to be productive by adding a little bit of growth to each spur which will give next years fruit. Eventually that spur bends down with the weight of fruit on it and becomes a spur or branch below the branch which you will dormant prune off. We use a heavy glove and just rub them off. Try it since you already understand that that branch angle is productive.
As a transition to having a fully trained tree I dormant prune one or 2 of the most vertical main branches each year until I get a tree with all branches below horizontal. Follow up with 1-2 years of summer training and you will enjoy years of FAR easier pruning. My trees have gone from: OK where do I start (since there is so much to remove) to now Ok is there ANYTHING to remove. A dramatic change.


Pruning

Stefan doesn't use secateurs for pruning, just a pruning saw for large branches and his hands. 
You prune when the tree is in a dormant stage

There are three major actions you take in pruning a fruit tree:

1. Create a Chimney

Just like in a compost heap you need to create a chimney up with central trunk of the tree to aid in air circulation for the tree and light to ripen the fruit.  Take every set of leaves off branches up to a handspan length from trunk. As the trunk increases in size you extend this distance.  
You can see from this tree that there is a section of the branch clear of
vegetation next to the trunk.

2. Select the best 12-14 branches only

There is a three point rule to follow in selecting what branches get pruned or stay... LBL 

- Low hanging branches

- Big branches

- Line

Low Hanging Branches - It is best practice to have the first branch between 1-2 metres from the ground.  Remember the branches will be trained downwards so you need height for this to work.
Stefan does leave one or two low branches for the rabbits because his theory is that "If you don't give it to them, they will get it" and to get at the higher fruit could end up damaging the bark of the tree.

Big Branches - 

Branches should never be over 50% of the trunk size so on an established tree select what 12-14 branches to keep.   You may have to reduce larger branches over a couple of seasons as the rule is no more than 33% of the tree should be removed at pruning.  If the branch is not required to grow again in this area then simply cut 2mm from the collar (the collar is the thickened area where the branch meets the trunk.
You can see the raised area around the branch where
it comes out from the trunk - that's called the collar. 


Always cut off the branch first further down so that the weight of the branch isn't a problem with making the important cut close to the trunk. If you want the branch to return then encourage it with a Cocks Spur cut - slant the cut downwards from 2mm at the top to approx 1 cm out from the collar at the bottom of the cut. This extra wood will wake up latent buds and create new branch growth.

If you want to instead encourage a branch somewhere else on the trunk then simply cut a small slit in the trunk and this should stimulate a new bud and over time a new branch.

The Line - 
Avoid favouring a branch that is going towards another tree or jutting out into the working isle in your orchard.  The X pattern is the ideal shape to work to. Stefan recommends 1 metre between sets of branches.

3. The Finish

It's important to maintain the integrity of the tree - don't cut out the top or trim off the end of branches. Think of the top of the main trunk as the head and the end of the branches as the fingers. 
Stefan's last job is to put on gloves and run hand under each branch knocking off the fruiting spurs on the underside of the branch.  This is to encourage larger fruit and to ensure all the fruit is ripened as one time as any fruit on the underside wouldn't get the sun to ripen.  This may not bother you if you are not wanting to harvest all at one time, but there is also a danger once you pick the fruit from the top of the branch then the underside fruit will be exposed to sun all at once and could get sunburnt.

Stefan's orchard design

Stefan has used the French principles of tree training and pruning but his orchard design is more like a Permaculture Food Forest with plant tiers - but still looks like an orchard.

He has designed the layout so no apple tree is beside another apple and has a pattern with this combination of trees:  NAP
Nitrogen Fixing tree
Apple
Pear or Plum

To further complicate things he has each orchard row fruiting at the same time so that his customers can go down that row and pick their own and have the choice of variety.  If all he had were apple trees then this would be a demand on the soil fertility, but with a nitrogen fixing tree nearby and a plum or pear that may have different soil biology needs it's all in balance.   And a big plus is that pests may hit one apple but will not easily find the next apple tree.

Under each three he plants 4-6 shrubs especially fruits like gooseberry, raspberries, currants that don't need full sun.  (We need to note that Stefan mentioned that our plants seem to be on steroids the size they grow so some of our shrugging plants would be too big for an understory - he says for example that sage bushes in his orchard are about half the size of what grows here.)

Then he adds another 16 perennials and these are often perennial vegetables like NZ Spinach, seakale, sorrel, garlic chives, Egyptian onions, lovage, mint and herbs.

He uses plastic over the ground around this area, cutting holes for the planted shrubs and perennials.
This suits his situation and he says he explains why in his film.

On the Good, better or best scale - this half day workshop was BEST.  I now feel I can have a try at growing fruit trees.  Thank you Stefan.


Under the nitrogen fixing tree (he uses Honey Locusts) he plants a grapevine.


Friday, 24 April 2015

Enhancing Photosynthesis with Compost Teas at Chaos Springs

Our Go Organic horticulture class had the privilege of a half day with Steve and Jenny Erickson at their 200 acre organic farm close to Waihi where they do dairy grazing, make certified organic compost that is shipped all over the country, sell lemons, garlic, potatoes and Steve's famous compost teas.  We were primarily here to understand more about compost tea production.

They purchased the 200 acre property in 2001and looking at the lush pastures today, it's hard to imagine it was once covered in gorse and ragwort. The ragwort problem inspired Steve to try compost teas.  Dr Elaine Ingham of the food soil web fame talks about weeds having a purpose as part of plant succession to build bacterial soil into a balanced bacterial and fungal soil flora. Pioneer plants in plant succession are often annual weeds with high nutrient value that grow quickly, die, and then lay down organic material to aid in building the soil biology. Pasture needs a bacterial fungal balance to be productive.  Weeds are the fixers or bandages on bare or depleted soils.

So if Steve was to just remove the ragwort it would not have served its purpose and next season would pop up again, just as it does for farmers who spray it.  He had to remove the ragwort because he needed to make an income grazing stock. In a home garden situation you could allow this cycle to play out before cultivating. So Steve collected the ragwort and made a plant extract and returned it to the land as a sprayed on tea.  Within one year he had got rid of the ragwort.

Steve showing up the mechanical
stirrer to replicate
the Bio Dynamic stirring process.
Steve makes aerated teas from diluted compost and plant extracts. He aerates mechanically to reproduce Steiners Biodynamic stirring process.

This machine creates a vortex one way and then the other.  The action changes the anaerobic solution into an aerobic one and the action of the churning the water separates the microbes from the plant material. This is important if you want to spray sieved material to ensure the microbes will be in the remaining liquid.

This vortex action is mesmerising.
Foliar feeding with compost teas create a liquid carbon pathway bypassing the solid state of carbon breakdown. This means the plant exudates grows the soil microorganisms faster.  The plant feeds the microbes sugars and in return the microbes through the plant's root system deliver all the minerals the plant requires to grow well. The pasture the animals graze or the vegetables and fruit produced have a sweet vitality.  Steve says the dairy farmer is over the moon about the condition of the cows when they leave his place at 18 months old.  They are fit for the task as milking cows.  Compost teas enhance the photosynthesis process - speed up the whole cycle.

Foliar feeding of plants with compost teas have created one inch of topsoil in a year in Australia.

Steve told us about the work of Australian, Dr Christine Jones and the Soil Carbon Coalition. Christine is a Soil Ecologist and has the nickname over there of "Carbon Goddess".

Steve doesn't use any other form of fertiliser apart from the compost teas on his land except for fine lime that he sprays on in a liquid form at the rate of 50 kg/hectare. Application with water also makes the lime available to plants faster than a powder form.

Steve has used Bio-dynamic preparations because he could see the results but being someone who needs to know how things work he was pleased to discover the work of  scientist Philip S Callahan who has been able to explain in scientific terms concepts such as paramagnetism affecting plant growth.

The other tool he has used has been plant diversification. He sites that the growing popularity of a herbal lay is good but 30 different plant species should just be the starting point.  He stated "a bag of seed is worth ten times more than a bag of fertiliser".   He suggested when we grow cover crops not to stick to one other species but add variety as plants do best living in a mixed community.

Trish taking a close look and sniff of comfrey plant extract that
Steve will usually add to each of his Compost Teas.

We then braved the rain and had the opportunity of seeing just how Steve makes his brews.

He uses plant extracts in two ways:

1. To deal to problematic weeds by putting the problem weed exudates back on the land.  He and others have had success with ragwort, Scotch and Canadian thistles, lawn daisies and one woman claims to have got rid of comfrey using this same method.
2. A general biological nutritional feed of soil biology and minerals for the soil.

To make his teas he may use a selection of extracts and add some sea water as there are so many valuable minerals in seawater. He makes plant extracts of hay, cut pasture, comfrey, and even gorse (chopped up) as it's an excellent source of nitrogen. Every plant has different mineral compositions and the pioneer weeds like nightshade are often especially high in nutrient value. He had us all thinking of the weeds we would dearly like to get rid of on our properties.  If nothing else making a tea of them will be satisfying because at least we can get the positive of that weed's nutrient value back on the soil. The effort of weeding them out is rewarded.

Steve showing us the tanks of different extracts.
He says the hay extract when he looks under the microscope
is "buzzing with protozoa..millions of them"
He has large plastic and stainless steel containers up to 2000 litre capacity. For a 2000 litre container of material and water he is likely to get 12-1300 litres of extract.
The 2000 litre stainless steel container has California thistles in it.  Usually he covers the containers but this one was left uncovered and the pasture seed in amongst the materials have started to grow on top of the liquid.

Steve pointing out the plant growth on top of the  California thistle extract tank.

He decided to leave the plant topping because  "those plants are photosynthesising stuff into the liquid". 

To make the extract:

Harvest weeds or plant materials including roots and attached soil, press down until it fills your container.
Fill with water.  They will become fairly smelly for a few days but the smell will go away.  Comfrey seems to always stink no matter what you do.
The plant material will float but will eventually over 3 to 8 weeks drop to the bottom and change in colour indicating it should be ready to be drained off as the nutrients have been extracted from the plant material.

To make a nourishing tea he mixes a number of extracts using about 10 litres of each including a dilution of his compost and seawater.  This is all diluted at least 20:1 with water.

To put on the land he has to first aerate with his mixing machine to change from anaerobic to aerobic.  This addition of oxygen kills any pure anaerobic microbes, and allows other microbes to convert from anaerobic to aerobic. Anaerobic pathogens that can cause harm are eliminated.

He has always made his extracts anaerobically and has found 30 minutes aeration is all that is needed to change it to an aerobic solution.  Spraying of course also aerates.

At home you can aerate by hand for half an hour stirring one way with your hand to make a vortex, then change to other way.  If doing this by hand I would add some warm water as part of the dilution to make it a more pleasant task as they do in Biodynamic stirrings.

Steve says you can just keep the extracts in the tanks until you need them.  He has some extracts that date back to one year.  Like with seaweed extracts the visual sign when its ready to use is when the materials sink to the bottom.

Steve did a number of tests to see if the visual signs of colour change and material sinking to the bottom stacked up with other scientific methods of monitoring.

He checked the temperature.  The temperature only raised a couple of degrees above ambient temperature and dropped down to ambient temperature in 4-5 days.

The other measure was pH.  The pH after 3 days had dropped down from neutral to 3 and over time it gradually returned to neutral.

He used an EC  (electrical connectivity) meter that measures the amount of minerals in the solution.  It doesn't tell you what minerals just how much. The EC metre measure started low and gradually rose until it started to level off.  The time it started to level off was the same time that the material dropped to the bottom.

Steve then showed us his mixer and spraying unit. His spraying unit
has no filters as there will be small bits of plant material in the tea.
On our way to visit his compost making set up he showed us his saltwater feeding station for the stock.  He says his cows fight over getting first licks of the fresh salt water he gets from the ocean 20 minutes drive away.

Seawater feeding station for stock

 Steve has been a commercial compost maker for many years both in the US and at Chaos Springs so he has an impressive array of machinery to enable him to make compost in large quantities.
Compost silver. The fine material is used in the compost tea.
Compost is made in long strips. He monitors for temperature, moisture and odour and writes down the results every day for the first month. For Biogro certification you have to have records of the heap reaching a temperature of 55 degrees C for 15 days and it has to be turned five times.


If the mix is perfect it will only need to be turned half a dozen times. You turn the compost to homogenise the materials and every heap can vary.

If it heats up too high over 65 degrees then he knows he has to add some more carbon. The test on whether the carbon nitrogen ratio is correct is if the temperature rises as expected.

 If it is taking too long to increase in temperature he knows that more nitrogenous material needs to be added and he will add some more grass or fish fertiliser to correct.

He prefers poplar, willow, aspen or avocado trees to pine as the carbon component because the tannins in pine make the compost process more difficult.  He told us that adding seawater can help raise the temperature of the heap.  He puts on 100 litres of seawater over each pile which is 30 cubic metres.

Manure is vital to the compost process and Steve has made a pen close to the compost area where he can put 100 cows overnight. The purpose is to gather their manure from one concentrated area.


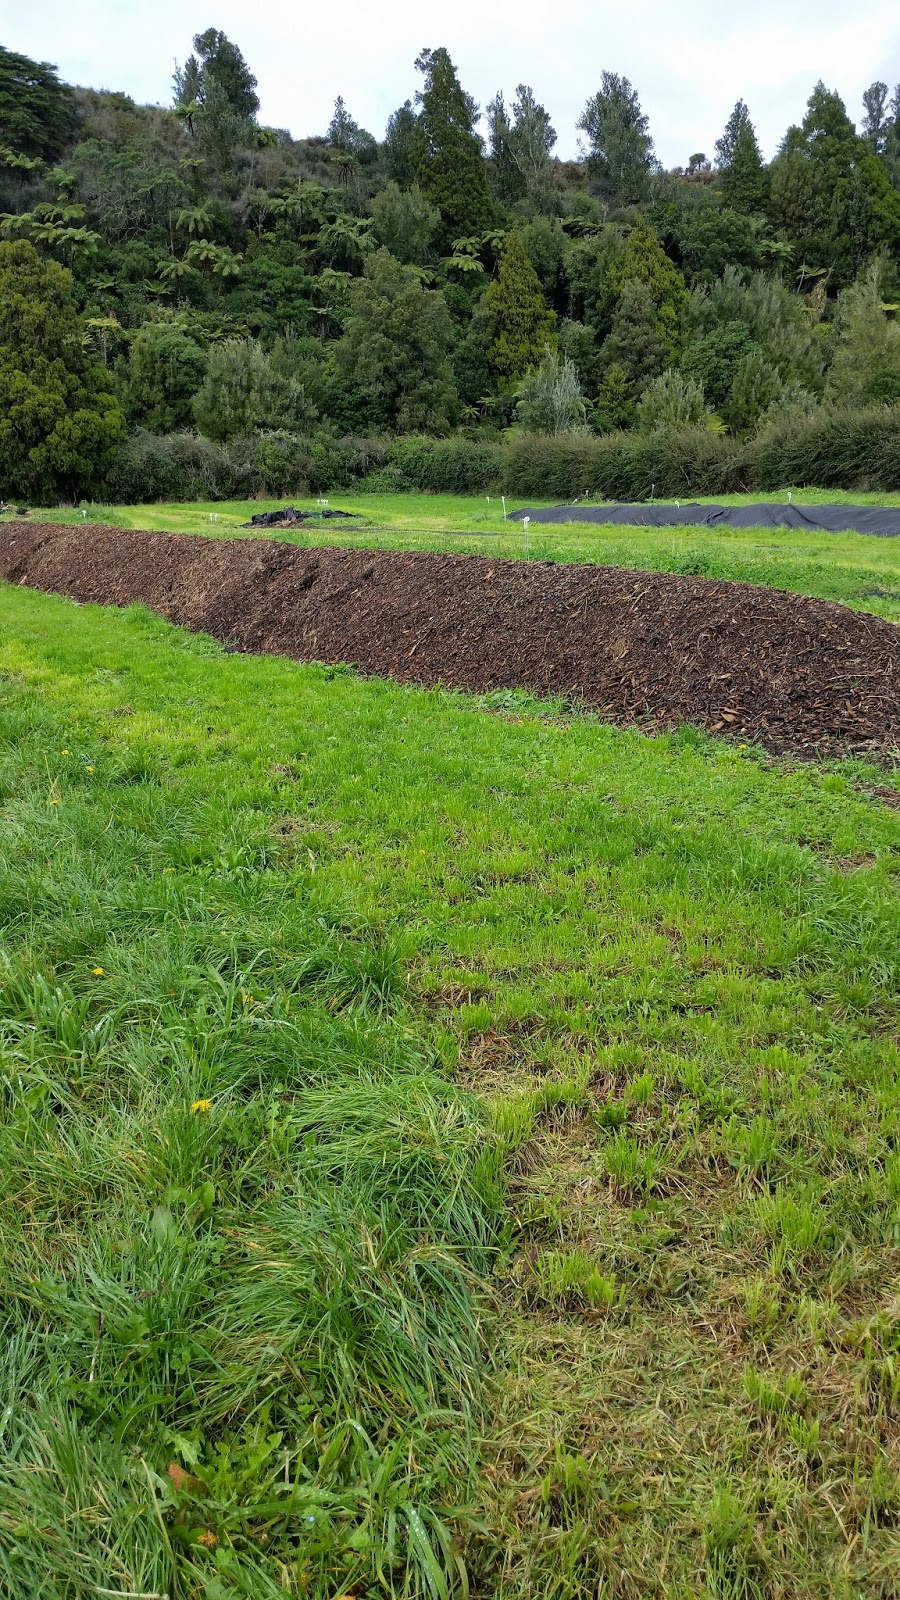
Compost heap with fleece cover
The heaps are covered with a poly fleece that is light, black to attract heat and is permeable enough to let in some moisture but to keep excess moisture out.  Steve imported this fleece from the US.

So much easier to handle and looks so tidy compared with the recycled carpet we as home gardeners have to use.

The compost was impressive as was Jenny and Steve's home garden.
Jenny dug into her garden and the soil was picture perfect full of worms, dark, fine aggregates all holding together well.

Everything including Jenny and Steve looked full of life. The landscape with native bush backdrop was lovely including the hedgerows dividing up the paddocks.


Steve curses the Barberry Barberis vulgaris hedges as they are such prickly customers to maintain but I immediately spied the fruit ready for the picking.  He said we could help ourselves so I enlisted the help of Sinead with the promise of a jar of Barberry jelly for her efforts.


Thursday, 26 March 2015

A Plant Disorder...the fun of diagnosing plant health problems

Over these past few weeks I've learnt so much about pests and diseases at the organic horticulture course I am completing with Agriculture NZ.  For this module we've benefitted from the superb knowledge base on this subject with our guest tutor Vivienne Cruickshank.  Vivienne works with Bio Grow assisting growers to gain organic certification as well as having hands on experience of previously owning and operating a commercial orchard. She has continued study in the large and quite often unknown world of bugs and diseases so we were really fortunate to learn pest and diseases 101 with her.  It impressed me that even with all this experience and knowledge Vivienne is still experimenting and wanting to try new methods of growing on her home property to help mitigate crop loss through disease and pests.

As one of my classmates Lezandra said, "I almost wish I could go back to being blissfully ignorant of what is happening to my plants and sleep easy at night".  Like Lezandra this new knowledge made me feel fearful because a disease or insect can completely devastate a crop.

But looking at the big picture and to what we have been told from the start on this course...get your soil right and the plants can take care of themselves... was also stressed by Vivienne as one of the best defences you can give plants.  The main thing I have learnt from these weeks is that in the world of pests and diseases it's not black and white - there is no one solution but a set of practices called Integrated Pest Management (IPM) that can be used to fight any invasion whether it is pest or disease. You may not always win but the knowledge will make you wiser for next time.

Very proud of my photo taken yesterday of two Monarch butterflies mating - dahlias in the background
at Sanctuary Community Gardens

It has opened my eyes to a whole new world and with eyeglass and camera in hand I am trying to observe and understand this massive world of bugs that previously I never really thought about.

One of our assignments was to observe examples of plant disorders - ill health not caused by insects or disease but by nutrient deficiencies or over supply of nutrients and weather conditions like frost and lack of water.

At our community garden's culinary herb plot the Angelica Angelica archangelica had most of it's older leaves dying off and the newer leaves looking rather striking but I knew something was really amiss.  It has been a very dry and hot summer and this northern European herb likes a cooler damper soil - so first question was - is this the right place for this plant?

No in this case.  But there are no real damp places at our gardens as the beauty of volcanic soil is that it has good drainage.  I then found out from another gardener that there is said to be a rock shelf in that particular corner of the garden making it impossible for the roots of the angelica to dive down for moisture.  But this coloration what did that indicate?

Almost looks like a variegated plant. photo taken 20 February 2015

I looked up my reference materials but it is so difficult to pin point a specific deficiency but on reading about volcanic soils my suspicions were confirmed. In dry conditions volcanic soils often won't allow plants to access Iron.

Iron deficiency typically has paler margins with the leaf veins remaining green.  I cut off the dying older leaves, watered and mulched around the angelica in the hope that we could keep it alive over the summer.

The even younger leaves were unfolding to be a better colour although there was still some yellowing around the margins.
Photo taken 20 February 2015

Nearly one month later and the mulching and watering seems to be working.

Photo taken 17th of March - showing up green for St Paddy's Day
This photo shows the margins could be yellowing but this is mainly due to the photograph on a sunny day.  It's not perfect but the improvement is quite marked.


I have decided we need to move it this winter where the parsley is growing well just a few feet away.  As the parsley grows it will help shade and keep cool the angelica while young.
Full grown angelica in my Otago Peninsula garden 2012

Angelica should grow up to 1.5 metres if its in the right place. It likes the climate and the clay soils at our garden in Dunedin and is a prolific self seeder.  By the way, flies are the pollinators for this herb not bees.

Thursday, 19 February 2015

Fluffy Bums my introduction to Auckland's garden pests


My first assignment in organic pest management is to create a management plan.

My Pest Story:

I discovered a pest that is in abundance in my garden by first mistaking it's identity.  I was making the cabbage tree tidy pulling off the dead leaves on the trunk when I spied what I thought could have been the cabbage tree looper Epiphyryne verriculata. I didn't want to upset an indigenous insect for the sake of a tidier looking cabbage tree, so I headed inside to look up "Butterflies and Moths of NZ" by Brian Parkinson and Brian Patrick.

No the looper didn't match what I was seeing.  So my next action in identifying what I thought was a moth was to text the photo to the best friend you can have in identifying bugs, Ruud Kleinpaste, aka "The Bugman".

Ruud sent me back a reply saying that he could forgive my ignorance because of my southern background where I wouldn't have come across this pest that is abundant in Auckland, the sucking insect - the Passion Vine Hopper Scolypopa australis that also has the nickname "Fluffy Bums". This isn't an affectionate name rather it describes the look of the Passion Vine Hopper at its young nymph stage. As it latin name suggests this is an insect that arrived into New Zealand from Australia as far back as the 1870's and is found from Nelson upwards.


Ruud suggested I go online and learn about them and how to prevent an invasion of them again next summer. He stated there is little I can do about them at this stage. I would need to hunt them down next winter and destroy them at egg laying stage.

At our organic community garden I was photographing the bronze foliage of a striking red dahlia when a cloud of tiny insects rose from the surrounding plants. My other entomologist friend is Trevor Crosby at the gardens.  I showed him the photo and he confirmed these too are Passion Vine Hoppers transitioning from nymph to adult.  They were like tiny helicopters compared to larger delicate lacy wingspan of the adult hopper.

Isn't it always the way...once told of something's existence that previously I had not noticed, I began seeing these hoppers everywhere in my garden.  They were coating the stems of my lime tree in a pot. Then I noticed they were in our broad leaf hedge Griselinia Griselinia littorals aka Kapuka, some leaves were sticky with the tell tale honeydew that sucking bugs create.


The question I have has this infestation been because of what looks like a fungal infection on the leaves or has the fungal infection come along because of the Passion Vine Hopper.  


Passion Vine Hopper Management Plan:


  1. Observed the adult hopper and initially thought it a native bug that I should protect
  2. Got correct identification and realised the potential damage that this bug could do to not only passion vines but other plants in the garden through reading up on it online.
  3. Observed this hopper was not only on the original plant but had infested a lime tree, and Griselinia hedge. Began seeing the adults and nymph's everywhere!
  4. From research realised I couldn't do much about them until winter (however have squatted a number of adults on the windows).
  5. Noticed the Griselinia had a big infection of hoppers at the Fluffy Bum stage as well as adults - question was the plant so weakened by the hoppers that it succumbed to a fungal disease.
  6. Immediate action for the lime tree and the Griselinia was to water well, then add Pacific Bio Fert to give the plants strength to fight the fungal disease, then water in EM (Effective Microbes) to inoculate the soil with microbes that may fight and counter disease.
  7. From March to October I need to ensure I hunt out evidence of eggs being laid on twigs of host plant. The eggs have fluffy tuffs that make them easy to identify (see below) Cut and burn or destroy wood and not put through compost.


    Passionvine hopper eggs
    Photo of plant stem with eggs of Passion Vine Hopper


Online information:

Passion Vine Hopper: Prune twiggy dead material from garden in winter (eggs appear as tiny bumps on twigs), then burn or hot compost. Spray insects directly with neem or pyrethrum if you already have an invasion. "Pull a Swiftie on Pests" by Meg Liptrip http://www.nzherald.co.nz/lifestyle/news/article.cfm?c_id=6&objectid=10788373


Passionvine Hoppers are a sap sucking bug. They cause a lot of damage, and are very difficult to spray. Take ten minutes to read about their lifecycle, and you will see that these Aussie imports hatch in spring as tiny, jumping nymphs, and by late summer they have grown lacey wings - now they fly as well as jump! However, from March to October they are laying very still in their eggs. Find them in the thin twigs and tendrils of the host plant. They are very obvious. The eggs are laid in lines the tufts of plant fibre give them away. Snip them out and feel very clever as you burn them! http://www.huttcity.govt.nz/Documents/brochures/Summer%20pests.pdf

Passionvine Hoppers
Passionvine hopper eggs
Passionvine hoppers are tiny moth-like insects with mottled wings that suck the sap from plants and cause your plant to lose its vigour. They can also cause honeydew and sooty mould.
They overwinter by laying eggs, so you can stop the cycle by finding and destroying their eggs and eliminating egg-laying sites such as tendrils, thin woody twigs and dying stems.(RNZIH Winterbugs Rudd Kleinpaste)


SUCKERS
Think of a digger. The way it drills into the soil is similar to the way suckers drill into plants. If the digger were to hit a water main, it would be exactly the way the sucking insects find their food. Suckers stick their mouthparts into the phloem of the plant and extract the sweet plant sap within. 
Sooty mouldSuckers excrete most of that sweet stuff as honeydew, which is eagerly harvested by ants. If you see a heap of ants going all over your plants, you know that a sucker must be at work, such as aphids on the underside of the leaves. 
Excess honeydew is a brilliant breeding ground for sooty mould. Here's a good infestation of mealy bug, causing sooty mould all over the place, including the bricks. 
Scale insects on flaxThis is a good example of massive numbers of suckers hammering the flax. They are scale insects and they are nicking all the sweet sap, causing local deficiencies in the leaves (discolouring of leaves). You see, that sweet sap is normally used for plant growth, including leaves, and the flax is suffering. 
Most suckers like aphids, scale insects, mealy bug, passionvine hopper, whitefly and green vegetable bug are like flying hypodermic needles, and that means they can spread diseases, especially viruses. That can be very serious for the health of the plant. 
General chemical control of sucking insects would be systemic insecticides such as Orthene or Target. With scale insects and mealy bugs, use mineral oil or mineral oil mixed with insecticide. Organic control of most suckers can be achieved with oil, fatty acids or Pyrethrum. (RNZIH Bug Detection Ruud Kleinpaste)


If you look at the tendrils of climbing plants (or any thin, woody twiggy stalks) you’ll notice regularly placed fluffy extrusions; each one represents an egg-laying site for passionvine hoppers. Get rid of them all and you’ll start the season with millions fewer fluffybums. http://www.earthcarenz.co.nz/news/latest-news/21-winter-is-still-good-for-gardening