Wednesday, 3 December 2014

The Perfect Heap

Today, the 24th of November 2014 our Agriculture NZ 'Go Organic' class constructed a free standing aerobic compost heap using effective micro organisms.  This method can be used in a bin system but our tutor Micky wanted us all to experience making a free standing heap...no timber infrastructure is required and its easier to create and turn without the constraint of bins. The heap's location is at John Allen's lovely mixed farming property just a few minutes drive out of Pukekohe.

Micky chose a flat space with room for turning the heap.
This is the before shot!

Some of the class had never made a hot compost heap before and none of us had perfected the freestanding heap.  Micky Cunningham, our tutor, is truly a "compost queen" and introduced to us today the art of constructing a magnificent freestanding compost heap.
The finished heap and the proud team that made it.

For me the major changes in thinking about composting today were:
1. Its all about the layers  - no layer higher than 5 inches (7.5 cm)
2. The stick base up to the knees for aeration
3. Chimneys also for aeration
4. Activated EM for microbial inoculation (bacterial, fungal and yeasts) that will keep the heap working even if the conditions become anaerobic .

John chose the location in amongst his orchard and he generously contributed a large percentage of the required carbon materials (old hay and woodchips). We all contributed a variety of materials from our home gardens and kitchens.  Following is the diary of the construction:

We all contributed to the heap with Bokashi compost, vermicast,
garden weeds and hedge clippings, shredded paper, old yogurt and cream, comfrey,
egg cartons, Kitchen scraps, Biofert fertiliser, wood chips, horse manure in sawdust, horse manure,
and old hay.

1050: Began laying the stick layer inside the marked out area of approx 2.5 metres long by 1.5 metres wide.  First layer we laid the sticks with lots of branches lengthwise. Then cross wise (using the lopper to trim the shorter crosswise sticks. Care was taken at the ends to make the edges defined.   A bag of short cut sticks were added at both ends that gave the ends a strong foundation.
Ideally the stick layer would not have green attached but Micky
said that the green will decompose quickly anyway.

Avoid creating the centre higher than the edges.


It's important to keep those sides as high as the centre and you consistently have
to build up the sides.

To test if you have enough sticks in place you need to stand in the centre and the sticks will hold you up to knee height.  We did about four layers to get the strength the sticks will need to remain standing with the weight of all the following compost layers.

The stick foundation should be able to take your weight and not compact down
too far.  It's going to have to hold a lot of weight and if the sticks collapse then the purpose of
this layer would be lost - i.e. air flow through the bottom of the stack.

1110: Place Chimneys
Chimneys in the form of strong straight sticks or Micky's plumbing pipes that we used are worked into the stick layer.  These chimney's ensure air flow around the heap.
You can use sticks but they need to be without side branches and strong - so that they can easily make
a chimney without breaking and can be removed easily. Chimneys have to be standing straight to create straight chimney holes.

 Place three along the centre of the heap, and triangulate two on each side to have a total of 8 chimneys for this sized heap.  We were short of two plumbing pipes so two thick bamboo poles were used to create the remaining two chimneys. As the heap is made these chimneys are jiggled to make a strong wall that won't fall in when removed at the end of the process.


The plumbing pipes are easy to work with and you know they won't break
or have knobbly bits that make compacting the chimney walls difficult.

1112: Hay Mattress
The first layer is a thick layer of hay or straw biscuits. This is an insulation layer but will also prevent materials falling down into the stick area.  Important to use any solid bricks at the corners to create the strong rectangular shape of the heap.
The straw bed done - it's now ready for many thin layers. (Photo: John Allen)


Layer 2 - Green Nitrogen layer
A 20 cm layer of garden weed materials layered over the hay. Never push down.  A thicker layer of green materials for this first green layer.
- Any weeds with seeds were placed towards the centre of the heap.
- Important to constantly build edges to keep flat.
- Water as you go with a hose - slightly wet the materials
- Coarse materials on the lower layers, kitchen stuff in the centre, and lighter stuff like shredded paper at the top as its lighter lifting work once the heap gets higher.
- Never place a heavy bag or bucket on the heap - or it will collapse - treat it like soufflé!
We all soon found out that Micky's suggestion of filling buckets is easier than
trying to manage spreading materials from bags directly especially as you cannot lean
the full bags on the heap.  
Buckets are very useful for moving materials to the heap. (Photo: Linda McComb)

Layer 3 - Carbon
Wood chips make the best compost both in texture and produces a good quantity of material.
- Use hay specifically for keeping the corners in place for each layer of carbon.
Hay ensures the heap keeps it's good shape

- Wet layer and start to wiggle chimneys. Wiggling essential to create a good chimney wall - a little like rammed earth walls.
These pipes may look as if they are leaning but the chimneys they have
produced through wriggling and compacting the walls are upright

1125 Layer 4 - Green 
Hedge clippings with a scattering of lawn clippings - lawn clippings should never be more than a 2cm layer.  Treat lawn clippings like adding Jalapeño peppers to a meal.  They both have a big impact - too much Jalapeño and your food is inedible and too much grass clippings and you get a slimy anaerobic mess in your heap. 
- Add animal manure through the heap in small quantities as manure contains important biology that will assist in the breaking down of the heap.  We had horse manure and started adding from this layer.


Layer 5 - Carbon
Autumn leaves (using wet clumps of leaves to shape the corners)
- Another jiggle of chimney.
- Dry carbon materials need a good watering
Ngaire  ensuring the dry autumn leaves
get a good watering

1130 Layer 6 - Green
Hedge clipping with grass clippings and a sprinkling of manure.
A successful heap is about balancing materials - not only carbon and nitrogen layers but always changing the textures - e,g, fine (shredded paper) vs rough (wood chips).
Micky double checking that the chimneys are upright. (Photo: Linda McComb)

Layer 7 - Carbon
Hay around the edges with wood chip and vacuum cleaner dust and ripped up egg cartons.
Like building a sandcastle - mould the edges up with hay  like a moat to ensure the edges are at the same height as the centre.  
Egg cartons need to be ripped up and well watered  in order to break down
(Photo: Linda McComb)


Layer 8 - Green & EM (Effective Micro-organisms)
Kitchen scraps supply food for EM.
- Citrus if added needs to be right in the centre to cook.
- Scattered some vermicast
- Watered and wriggled the chimney sticks.
- Added EM to the heap via bucket with holes punched in bottom - its a gentle and easily manoeuvred method of adding the EM liquid.
Wriggling the poles to make the chimneys entails moving the poles in a
circular motion creating a compacted circular wall (Photo: Linda McComb)
Inoculated with vermicast - (Photo: Linda McComb)
The EM needs to be prepared in advancehe EM needs to be prepared in advance by mixing molasses and EM liquid - first dissolve molasses in hot water, add cold water and add EM to same proportion. We used 40ml each of Molasses and EM to a 20 litre bucket. You need a number of hours for the EM to activate so best to start the process the night before and just fill the bucket with water on site.
EM really helps a heap because this special bacteria can work even in anaerobic conditions. While the stick stack and the chimneys ensure the heap is as aerobic as possible when we cover the heap this sets up an anaerobic situation.  EM will keep the heap smelling sweet.

On layers we used about 5 litres spread by a bucket with holes drilled.


1150 Layer 9 - Carbon
Sawdust with manure with hay edges
- Inoculated the heap with a small bucket of compost sprinkled over this layer
- Important that chimneys are up right - the hole we are creating is straight not slanting.
- Water well if using sawdust.


1155 Layer 10 - Green
Comfrey
- add manure blobs to the green rather than the carbon layers
- Another bucket of EM over the heap
- Sprinkled like you would icing sugar BioFert with Trace Elements to ensure we are not missing any trace elements in the materials we are using.
- Added some grass clippings to the edges to get some heat on the edge.

Layer 11 - Carbon
Mix of Wood Chip and shredded paper.
Shredded paper is a good carbon source but it doesn't make bulk in a completed compost - it disappears
quickly. Good news - you can use coloured paper and printing as these are no longer toxic...but avoid shiny papers.

Only material we didn't have at hand was cow manure. Cow manure is the best manure to use to introduce a diversity of micro flora and fauna into your heap.  The cow has four stomachs in which food is digested using different gut microbes in each stomach.
This lovely cow kindly posed for me on a farm near Waipou.

Layer 12 - Green
Green soft woody materials and grass clippings.
- old yoghurt, soured cream diluted with water and poured over heap.

If the milk goes off or you have powdered milk that is out of date,
the compost micro-organisms will gladly eat them. Same goes for
even old crusty jam - micro-organisms like us need sugars for energy.
Always dilute with water to ensure the spread of the food through the heap.


1215 Layer 13 - Carbon
Hay at edges and wood chip
Hay works well to keep edges strong but will only break down once the heap is turned.

Layer 14 - Green (mixed platter)
Bokashi put in the centre, seaweed, lawn clippings, comfrey tea
Wet down

1220 Layer 15 - Carbon
Layer of wood chip before lunch with hay edges
Always when taking a break finish with a carbon layer to avoid flies and smells.
By lunchtime we had a good looking heap retaining its good shape.

John observed that the heap seemed to be slightly smaller than earlier.  Micky said that was due to the weight of the materials on the stick structure.  If we hadn't made as good a layer as we had then the heap would be on the ground simply because of the weight.

We discussed that the layers are the key - keep them thin so that microbes can do the mixing up of materials rather than us.  Thicker layers would mean turning the heap 4-5 times instead of 2 times.

1235 LUNCH BREAK (John determined to get some cow manure for the heap went to his neighbours property and collected a large bucket of fresh manure)

1315 Layer 16 - Green
Garden weeding, Bokashi (in the centre) and water with EM

1320 Layer 17 - Carbon
Shredded paper with straw edges
- Added some horse manure
- Wiggled chimneys
- Watered well
You can see the chimney walls being formed by the regular working of the poles
each layer

1322 Layer 18 - Green
Garden green waste and lawn clippings.
- Added Cow manure over the layer and mixed a couple of buckets of cow manure slurry so
that it would inoculate the lower levels of the heap.
A slurry is a good way of getting the microbial life
present in cow manure down to the lower areas of the heap.
We did this because the cow manure only became available towards the
end of the heaps construction.  Manure you tend to add with the green layers.

1325 Layer 19 - Carbon
Wood chip layer and ripped newspapers

1330 Layer 20 - Green
Bokashi, Bio Fert sprinkling of fertiliser, lawn clippings.

Don't add lime as this will discourage fungi to work in the heap. The heap starts out acid but by the time the microbes and compost creatures do their work then the heap will have a perfect pH. Adding lime is not necessary.

1332 Layer 21 - Carbon
Wood chip, straw edges with cow manure slurry.
- Watered well especially making sure all the hay edges are well wetted down.
Trish made sure we watered both sides of the heap and to especially
make sure the sides are damp as a lot of hay was used to keep the
sides of the heap straight.

1339 Layer 22 - Green
Lawn clippings
- watered down with EM
The EM is also added on the green rather than the carbon layers.

1341 Layer 23 - Final layer of Carbon
The top layer is thicker than the rest. Used wood chip.
Then layer of straw.
Watered EM over the top and sides
Decided to finish up all the wood chips on the top.
Here is what the chimney's look like once the poles are removed.
(Photo: Linda McComb)

The poles or sticks are now removed to expose perfect chimneys through the heap. The heat generated in the heap will circulate air via the stick base and the chimneys.
The chimney sticks are removed and all that is left to do is to cover the heap.
This was done with two pieces of carpet with a system of slits to allow easy access to the heap.

Taking the Temperature of Heap
You can use a dairy thermometer to monitor the temperatures of the heap but John will be using Micky's digital thermometer to take the temperature daily.   The dairy thermometer needs to be in place for 2 minutes before getting an accurate reading. The heap was 21.6 both in the centre and the sides.  John will take the temperature of the centre of the heap and the edge each day, ideally at the same time of the day each day. The ideal heat of 60 degrees Celsius should be reached in 3-4 days.
Click on this to visit John's record of the heaps temperatures:
Hot Composting Temperature Record

Why is it important to make a heap hot?
- relatively quick to make a useable compost
- no toxic by-product
- discourages any rats or mice taking up residence because it's too darn hot
- good way to deal with pests, some diseases and weed seeds (the heap needs to reach 60 degrees to kill weed seeds)

It's also bad for the heap to get too hot - too much above 60 degrees will kill the helpful micro-organisms working at this temperature.  If this happens the heap has to be turned immediately to get air through to cool down.

The compost process has a number of microbial shift workers workers changing with the temperatures. The worms will only come into the heap once the initial heat has lowered.


John has not only been taking the temperatures from the centre and edges of the
heap as required, he has produced a chart documenting the air temperature, the morning and afternoon readings
and with this information has created an online chart of the heap's progress. (So good to have an engineer in the class).

Carpet cover for the heap
Covering the heap is necessary (even though it will restrict air flow) because:
- it will keep the heap not too wet, not too dry and not too cold
- avoid weed seeds escaping into John's orchard
- uncovered it would dry out and nitrogen and carbon will burn off and escape into the atmosphere
- will keep the edge at a temperature where decomposition can occur

Gaps for air circulation are made by cutting slits or flaps in the carpet.
Talbot was in charge of cutting the carpet slits

The flaps will make access to the heap centre easier for John to take the temperatures.


A couple of the chimneys place some bamboo sticks to keep a gap between carpet and the heap.
(These later were removed by John because the strong winds were lifting the carpet, but in a sheltered position this will aid in air circulation plus take weight off the heap.)

1400 our heap is complete.  
With many hands at work this 23 layered heap was constructed in two and a half hours from first laying the sticks to covering up.

In two weeks time we return to turn the heap.

The compost team all admiring their work moments after completion

Update

One week after the heap was down John's chart shows that the heap hasn't quite hit the 60 degrees mark - sitting at around 50 degrees.  He thinks this has been due to the weather and the high winds. In hindsight a more sheltered site would be preferable but with a dozen people working on the heap you need space.  The carpet was blown off the heap one day so he has now secured it with some rocks.


Monday, 10 November 2014

Dear Lottie


10 November 2014

Dear Lottie

I have been thinking that you must be missing your garden in Yarborough Street.

I thought I would let you know how the garden is progressing since moving in 8 months ago.

The hebe's have gone mad with flowers. They look lovely at the moment and while I was taking this photo this morning a woman walking the dog said "It looks very pretty".


Behind the Hebe's I put a rose "Julia" that my friend Julia gifted me from her mother in law along with a host of blue pots.  It was a sad looking thing but now has 6 small buds on the new shoots.  I put it in the centre of your front garden to give some height to the garden beside the lovely orangey-yellow blooms of the Californian Poppy that was already growing there.


Another rescue were the five pots of white geraniums. I am not sure whether or not you planted these or Jono. I am really pleased with how they have come back and I have them lined up to welcome visitors along the fence line before the gate.


 When Matt visited us in the winter I showed him the garden when the Clivia's were coming out that he really appreciated and couldn't get over the height of the palms growing in the garden. I know from visiting my home garden in Dunedin it's always good to see how trees and shrubs have grown.


 I took this shot late in the afternoon when the fig tree was just coming out.  The orange of the Clivia's late afternoon become almost fluorescent.  Peter has made up a name for the transformation from bud to leaves for Beau - Bidingo!   So Beau went around early spring pointing out all the trees and plants that were going "Bidingo".

When we arrived we tried to make a small veggie patch down on the lawn beside the Clivia's but everything got eaten.  I thought I would just have to live with pots but all over winter we have cut up organic material and buried our household Bokashi compost to the old veggie plot that exists above the clothes line.  I showed Matt this area when he visited but it was looking pretty ugly with piles of decomposing matter. It was worth that period of ugliness because now the soil is in great condition and I hope will now have water holding properties.  To test it I have put in a row of Swift new potatoes and they have grown amazingly well as you can see below.  The proof will be in the number of potatoes however - they should be ready either at Christmas or soon after.
In front of this garden I am growing a lemon balm hedge so that I can use the trimmings for organic material and attract bees to the garden...as well as enjoying long cool drinks with a sprig of lemon balm in the summer in the backyard.  We are really looking forward to those upcoming days.

On the brick area lives the Olive Tree that is doing well and has tiny fruits, three tomatoes and two bags of potatoes.  I found the bags in the shed and not sure if these were yours or Jono's.  Anyway I thought it worth a try to grow some Swift new potatoes in a bag as I haven't tried this before.

In the background is my cluster of pots around a small garden plot with sorrel and parsley, and as you can see I have NEARLY weeded the brick path.   As the bricks have such large gaps I have brought from my Dunedin garden some chamomile and pennyroyal mint to grow on the path gaps instead of onion weed and grass.  The herb garden below the brick wall is going strong.  I have just added some more parsley and some perennial Italian Arugala (Rocket).

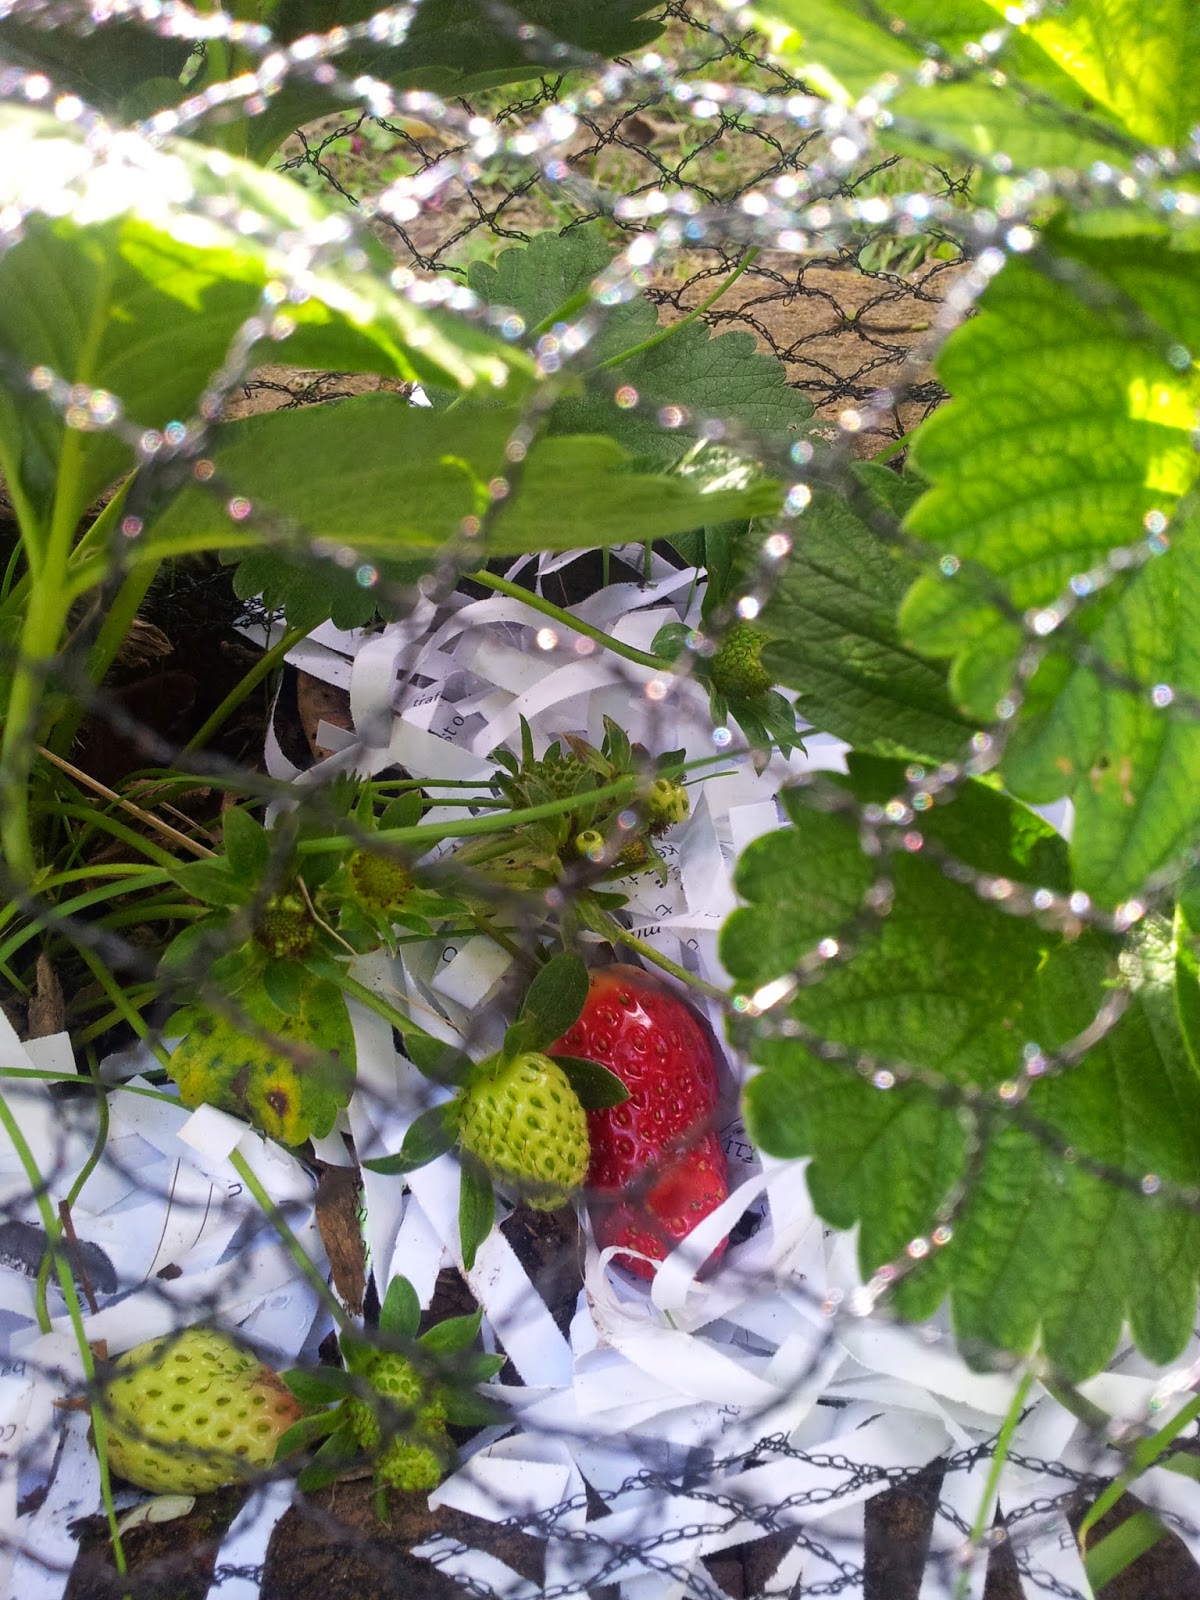
I planted out strawberry plants that I got from Tansy's garden when we moved along the top of the bricks.  It's a shallow garden but I have mulched it really well with leaf litter from our community gardens and once the strawberries started to appear I used what I call urban straw (shredded paper) to keep the fruit dry and covered with netting to save them from the birds...and we have three or four ready to pick tonight.

I will continue to update you of your southern garden via the mobile app Instagram #Lottiesgarden.  You can also follow my kitchen-garden Instagram #Jeannieskitchen #Sanctuarygardendiary. This way I can just take a photo and post it immediately. 

I am continuing this blog page for documentation, required by my Organics course, of the planting and maintenance work I have completed on the property.


22 February 2015

Dear Lottie
Thank you for permission to plant the large olive tree Olea Europea J5 into the front garden.   It is crying out to be released from its pot - even though we had replanted it into the largest pot we could find last winter it was always difficult to keep the water up to it.

For your records the label said: A vigorous upright tree. Produces heavy crops of large fruit with high soil content. Excellent for picking. Cold hardy. Well suited to Auckland and northern regions. Resistant to peacock spot (whatever that is). 

It did fruit this year but the birds got to harvest before I did. As the foliage is an attractive green grey I have decided to plant 5 grey Santolina shrubs to form a grey hedge background to the olive.  The small mauve with yellow centre daisy that I haven't yet identified I have cut back because it is becoming quite "leggy" and unruly.  It should be allowed to remain but in behind the white camellias.

19 March 2015

Dear Lottie
We have moved upstairs and have now another small patch of garden in the centre of the concrete entrance courtyard to upstairs. I am looking forward to keeping as many pots as possible in this area because its so sheltered and warm...although there is surprisingly less sunlight hours than I thought.

I am going to utilise this small plot which is only 1 metre by 50 cm.   But yuk!  I discovered heavy sodden clay - real yellow stuff. There is no sign of worm life and the thin layer of topsoil has had lot of gravel added. As this layer is friable I set it aside and dug down 45 cm removing the clay clods. The two large buckets of clay I spread under the big trees at the back of the section.

I sprinkled dolomite into the hole to assist with further break down of the clay but really needed gypsum.  Also aerated well by pushing down garden fork into the clay surface.  I was careful not to step into the garden to avoid further compaction of the soil.

I notice little skinks live in this area as I see them scurrying from garden to hide around pots against the walls.  I am going to put in some large stones to give them some safe haven in the garden from probably their greatest predator "Ollie the cat".

22 March 2015

Dear Lottie

The gaping hole is still in the courtyard garden.  I have added the contents of my Bokashi compost bucket to the prepared ground in the courtyard plot and filled up the plot with a mix of the topsoil kept aside.  Painstakingly tried to pick out all the teeny wild garlic type bulbs that this area seems to be chock full with them.  I will leave the Bokashi for a period before planting.

29 March 2015

Dear Lottie
Planted 5 Santolina aka Cotton Lavender as a hedge.   These are leftovers from our Community garden's plant sale.  I have been reviving them at home while still in their plant bags by trimming back and watered with fish fertiliser.   I am now planting them with a handful Bio Fert Garden Plus fertiliser and a couple of handfuls of our class compost.  These will be the"background singers" for the Olive.


It's a constant task digging out the onion weed and Japanese anemone runners from this front garden. All I can do is keep them in check and plant up the area enough to give them no room to expand.Otherwise if left this garden would be entirely covered with anemone and onion weed.

17 April 2015

Dear Lottie
Enjoying a lovely overcast but warm day while digging over the courtyard garden weeding out evermore wild onion bulbs ...tiny bulbs!  Bokashi nearly totally broken down.

Decided to do something with the foot square plot inside the gate and have purchased a climber Dipladenia sanderii rosea to go in that shaded foot-square corner in the hope that will climb over the not so interesting roughcast wall.  It will have shady conditions at the base but once its up on top of the wall it will get plenty of sun.  I chose it because of the pretty pink trumpet shaped flowers that continue to flower year round.  I planted it with two buckets of organic compost, handful of Pacific Biofert and topped off with well rotted wood chip.


Into the larger plot in the centre of the courtyard I planted the larger of the two Rosemary's growing in a pot as the centre piece.  I planted three well established Alyssum plants as a food source for beneficial insects, a piece of Suffolk Marjoram in the right hand corner and thyme in the top left hand corner.  Also as this is going to be my easy go to kitchen herb plot I have planted one of the celery plants I purchased to grow at the Community garden.  Also planted 3 Red Mizuna that I think I have left a little long before planting out but going to give them a go.  All the plants in this area have benefited from a dressing of Pacific Biofert, a handful of our class compost mixed with Daltons commercial compost and a covering of well decomposed wood chip.


While in this garden area I also trimmed off all the blotchy geranium leaves of my reliable and frequent flowering white geraniums in 5 pots.   They look good along the wall.  I would like to try and get some more geraniums growing on the sunniest part of the wall as you see in Spain.


19 April 2015


Dear Lottie
Today I planted 3 bulbs of Hyacinth "Sky Jacket" for scented spring on our outside dining table.  Used our class compost as its quite chunky so that there will be good drainage as Hyacinths don't like wet feet.

My local garden centre owner said not to put the bulbs in the fridge.  I had asked about chilling the bulbs in this warmer climate. Would the bulbs get old enough to trigger new growth. I would need a separate fridge for the chilling because other fruit and vegetables produce ethylene gas when ripening and this can cause damage to the bulbs.  I await to see if they will sprout out and be a fine table piece.

 2 May 2015

Dear Lottie
A patchy but warm day that started with me intending on making compost...but I saw all the weed growth in the bush area of the section.  The Poroporo tree was dead so I decided to deconstruct it and lay down the branches to eventually break down.  Most of the weed was an invasive vine that I have yet to identify that was climbing up into the canopy of the tree ferns and palms.  I managed to fill a 50 litre black plastic rubbish bag and put it behind a tree to sit for a long time before putting through the compost.  I would like to slowly build up the native species in this part of the garden to keep the weeds down and to attract birds and have a habitat for native insects.  I did see holes in the Poroporo and then discovered a tree weta that I showed 4 year old  Beau.  I want him to be unafraid of seemingly frightening but harmless insects like our native weta.

I also sprayed the geraniums in the pots with a 50/50 kefir whey and water to fight against what I think is rust fungal infection removing the really damaged leaves before spraying. 

11 May 2015

Dear Lottie
Planted 3 Kawkawa Macropiper excelsum aka Pepper Tree plants in the bush area where the Poroporo tree had previously been.  They should do well in this forest type environment and I'm keen to use its culinary and medicinal qualities.  These were given to me by my organic course colleague Sue.
The kawakawa leaves with holes is said to mean those leaves have more of the active medicinal
ingredient than leaves without holes.  

7th June 2015

Dear Lottie
Two of the three hyacinths have come through in the pots outside.

Lots of onion weeds appearing in small courtyard garden.

Raked leaves from lawn and gathered a sack of Plane tree leaves from Selby Square with Beau and put both leaf types in and around the row of Griselinia down the side of the house.  One of the Griselinia's have died and they looked very sick  (except for the one beside the door) for a while over the dry summer.  The applications of Bokashi water and a dressing of Biofert seems to have helped them quite a bit.  On the look out for Passion Vine Hoppers (Fluffy-bums) laying their eggs on some of the small dead branches.

Began prep of front garden for planting of Olive tree in the centre. dug an enormous hole and was relieved to find out it wasn't all heavy clay.  Spent ages digging up onion weed bulbs and Japanese anemone.

The White Camelias are looking particularly healthy and glossy and are now in full bloom of a most pure white. (Lovely)
This shows the height of the camellias when I stand 4 year old Beau beside them.

19 June 2015

Dear Lottie
Peter planted the olive tree (under my instructions).  I had previously watered it well and he planted it with a mix of compost from Chaos Springs and the garden soil. 

Luckily the Olives roots were in good order as we had repotted it earlier in the year.


The Olive has given the garden an additional level and looks in proportion with the house.
We also like the idea of a tree representing peace be at our front entrance.


Let me tell you about "Julia" the rose.  Today I pruned "Julia" really hard ready for her journey down to Tauranga. My work is done .. and we are returning her to her namesake Julia is a wonderful woodland garden.  Was given Julia when we first moved in as my friend Julia didn't have room for her.  She came from Julia's mother in law's house.  Julia the rose was in a sorry state but I potted her
up and put her in the centre of the front garden to add a little height...and hopefully some blooms.

Julia the rose has also done good work here  but she did take a lot of attention especially watering.


October 2014 good healthy foliage; so pleased to
discover the Californian Poppies - these last for ages.
November 2014 with Hebe in full bloom and Californian poppy making colourful display.
Lots of foliage but no flower as yet.

Julia has bloomed 3rd December
As a parting gift I gave Julia some of Chaos Springs compost mixed with some Biofert and topped with well rotted wood chip.

25 June 2015

Dear Lottie
I dug  in a trench of Bokashi around the Olive tree to encourage more worm activity and to add fertility.

The Olive tree really likes it's new home as are the Santolina's that form a semi-circle behind the tree.
Also dug some Bokashi into a trench behind Santolina that I plan to plant sweet pea seeds.


At last transplanted the mystery yellow perennial that was growing in the area where the Olive tree is planted.  Have decided that the area that we have attempted to grow veggies in is a hopeless case because of the amount of predation and not enough sunlight hours. So will try a number of perennials that can serve as habitats for insects. (In digging for the planting of the mystery yellow plant I discovered a group of Swift potatoes that failed miserably earlier in the summer...my excitement was short-lived when I discovered in the kitchen that the flesh was all watery.  You can see that there is plenty of mulch that has been laid down in this area...perhaps it will have a better life as a flower garden.
Red Mizuna with a celery plant partly obscured by it;s red foliage.

Peter commented today how attractive the Red Mizuna is in the small courtyard plot.  It's red coral like leaves soften the edges of the concrete and it's handy to pick to add to salads.

Looking down at the mystery lavender blue with yellow centre daisy
that I have clipped back to hug against the wall of the house behind the white camellias.

Tuesday 30 June

Dear Lottie
It's a soft drizzling rain but I was determined to get rid of those many wild onion bulb weeds that annoy me overtime I walk down the stairs.

I didn't mind weeding because I had plants I could replace the weeds with.  


I have planted in there (believe tor not) 
- 1 xBishops Flower seedling (because of its umbelliferous flower head that will attract beneficial insects like hover flies and parasitic wasps
- 4 x rooted pieces of carpet thyme from the Sanctuary community garden
- 1 x Corn Salad
- 2 x caraway which will also have the umbelliferous flower head when it goes to flower

It's my small and perfectly formed kitchen garden and asI pass it everyday I enjoy seeing its progress.


The climber has survived so far and on the left hand side a leader is heading up the wall. The Busy Lizzies or Patience Impatiens are looking like they love this damp and often shady corner. Busy Lizzies can get zapped by frosts but I am hoping that the concrete wall's passive heat sink will ensure they don't succumb.


Two of the tree Hyacinths are doing really well (testament to our class compost!). While I thought three would look better than two on the table - it's okay with two.  The third one I will either buy a ready grown bulb or buy a vivid mini cyclamen. 

One thing about gardening Lottie is that nothing is ever constant - if you like constant change be a gardener.